Waterproofing Joints and Penetrations: A Practical Guide

A waterproofing membrane can cover an entire foundation wall, balcony, or roof deck and still allow water to enter at a single poorly detailed joint. The same problem occurs where pipes, drains, fasteners, or other building components pass through the waterproofing layer.
These locations are vulnerable because the protective layer changes direction, connects to another material, or must accommodate movement.
Reliable waterproofing depends on maintaining a continuous water-control system across joints, transitions, and penetrations. Sealants, flashing tapes, waterstops, collars, and specialized joint systems perform different functions. They are not interchangeable simply because they are marketed as waterproof.
This guide explains how these materials work, where each is appropriate, what makes an installation detail reliable, and how to recognize common causes of failure.
Why Do Waterproofing Systems Fail at Joints and Penetrations?
A waterproofing system must control water across the entire building assembly, not only across large uninterrupted surfaces.
Joints and penetrations create potential interruptions in that protection.
Common examples include:
A pipe passing through a basement foundation wall
A construction joint between two concrete placements
An expansion joint in a roof deck
The connection between a balcony membrane and a door threshold
A drain installed through a waterproofed floor
A window or vent penetrating an exterior wall
A transition between a horizontal waterproofing membrane and a vertical wall
Several factors can make these locations difficult to waterproof.
First, different materials may expand, contract, or move independently.
Second, the seal may need to connect materials with different surface properties, such as concrete, metal, plastic, and polymer membranes.
Third, water may approach the detail from different directions or under different pressures.
Finally, joints and penetrations often involve several trades. One contractor may install the membrane while another installs pipes, windows, railings, or mechanical equipment.
Without coordinated detailing, each component may be installed correctly in isolation while the completed connection remains vulnerable.
Not All Joints Need the Same Waterproofing Detail
Before choosing a product, identify what type of opening or connection needs protection.
| Joint or Opening | Main Challenge | Typical Protection Approach |
|---|---|---|
| Static gap between compatible building materials | Maintaining adhesion and water resistance | Appropriate sealant or approved transition detail |
| Moving exterior wall joint | Expansion, contraction, and adhesion | Movement-rated sealant with designed joint geometry |
| Concrete construction joint | Water moving through the interface between concrete placements | Waterstop or specified joint treatment with membrane continuity |
| Structural expansion joint | Significant anticipated movement | Engineered expansion-joint waterproofing assembly |
| Pipe through an exterior wall | Interruption of the drainage plane | Compatible flashing, collar, gasket, or sealed transition |
| Pipe through a below-grade foundation | Possible groundwater pressure and differential movement | Specified pipe-penetration assembly integrated with waterproofing |
| Waterproofing membrane seam | Continuity between adjacent membrane sections | Manufacturer-approved overlap, weld, adhesive, or seam tape |
| Drain through a roof or waterproofed deck | Concentrated water flow and membrane termination | Compatible drain assembly and membrane connection |
These approaches are starting points rather than universal specifications.
The exact detail depends on the waterproofing system, exposure conditions, movement, and substrate.
Sealants, Tapes, Membranes, and Waterstops: What's the Difference?
A common source of confusion is treating every sealing product as though it performs the same job.
In practice, each category has a different primary function.
Joint sealants
Joint sealants are materials applied into or across an opening to limit the passage of water, air, or other substances.
Many exterior sealants are elastomeric, meaning they can deform and recover within their specified movement range.
Common formulations include silicone, polyurethane, and hybrid polymer sealants.
The appropriate material depends on adhesion, movement, exposure, substrate compatibility, and the manufacturer's intended application.
A sealant may be an important component of a waterproofing system without serving as the primary waterproofing layer.
Flashing and waterproofing tapes
Flashing tapes are commonly used to create sealed transitions around building openings and within certain air- and water-control systems.
They may have butyl, acrylic, asphalt-based, or other adhesive technologies.
Tapes used for exterior wall flashing are not automatically suitable for below-grade hydrostatic pressure or continuous immersion.
Likewise, a general-purpose construction tape should not be substituted for a membrane manufacturer's approved seam or detailing tape.
Waterproofing membranes
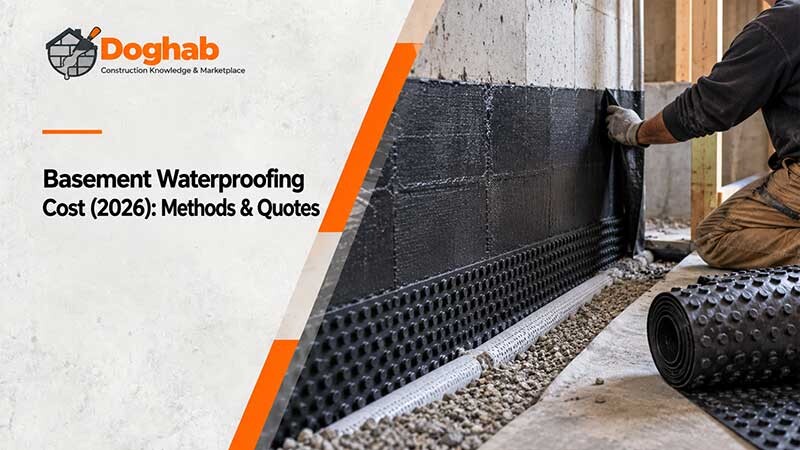
A waterproofing membrane provides a continuous protective layer across a building surface.
Membranes may be liquid-applied, self-adhered, mechanically attached, heat-welded, or installed by another approved method.
At a joint or penetration, the membrane must connect to the adjacent components without creating an unprotected gap.
Special detailing materials may be required to maintain continuity.
Waterstops
Waterstops are used within certain concrete joints to resist water passing through the joint.
Common categories include embedded thermoplastic profiles, rubber waterstops, and hydrophilic materials that swell when exposed to water.
They are especially relevant in concrete foundations and other structures exposed to groundwater.
A waterstop is not simply a substitute for caulk applied to the exposed face of a joint.
Prefabricated collars, boots, and gaskets
These components are designed to seal around particular penetrations or building interfaces.
Examples include pipe boots, membrane collars, compression seals, and drain-flange assemblies.
Their purpose is to form a controlled transition between the penetrating component and the surrounding waterproofing.
The product must be compatible with the membrane and suitable for the expected movement, water exposure, and installation conditions.
Comparing Waterproofing Materials
| Material | Main Function | Important Selection Factor | Common Misuse |
|---|---|---|---|
| Silicone sealant | Flexible sealing of approved joints | Adhesion, movement, exposure, paintability, and compatibility | Assuming every silicone is suitable for every substrate |
| Polyurethane sealant | Elastic sealing of suitable construction joints | Movement capacity, curing conditions, substrate, and exposure | Using it as an unverified repair for a failed membrane |
| Hybrid polymer sealant | Sealing compatible construction interfaces | Product-specific adhesion, movement, and weather resistance | Assuming all hybrid formulations perform identically |
| Butyl or acrylic flashing tape | Sealing approved laps and flashing transitions | Adhesive compatibility, temperature, surface preparation | Using ordinary flashing tape below grade without approval |
| Membrane detailing strip | Reinforcing or bridging specified membrane transitions | Compatibility with the parent membrane and expected movement | Mixing unrelated waterproofing systems |
| Hydrophilic waterstop | Water resistance at specified concrete joints | Confinement, water exposure, and joint design | Installing where unrestricted swelling can occur |
| Embedded PVC or rubber waterstop | Water resistance through concrete joints | Placement, joint movement, and continuity | Treating it as a surface-applied sealant |
| Pipe collar or compression seal | Sealing around a penetration | Pipe dimensions, movement, water pressure, and membrane integration | Relying on surface caulk instead of the required assembly |
No material category is automatically best.
The critical question is whether the complete detail can perform under the specific conditions of the building.
Sealant vs. Waterproofing Membrane
A sealant and a waterproofing membrane may both resist water, but they usually have different roles.
A joint sealant is commonly used to close a defined opening between two surfaces.
A membrane provides protection across a broader continuous area.
Consider a balcony deck where the waterproofing meets an exterior wall.
The membrane protects the deck surface and must transition into the wall's water-control assembly. A compatible sealant may help complete a termination or specific connection, but a bead of sealant along the wall does not automatically replace the required flashing or membrane upturn.
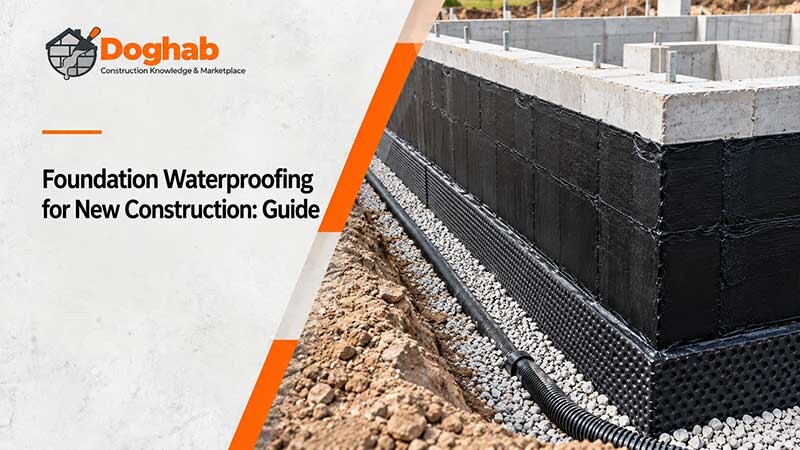
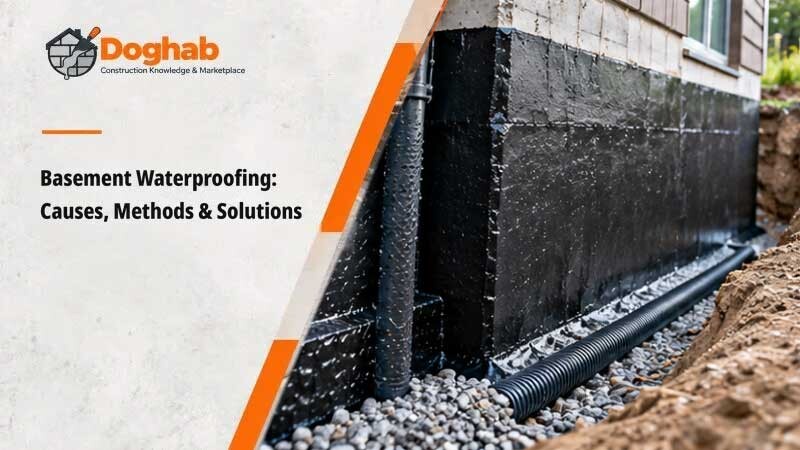
Similarly, a below-grade foundation can have a continuous exterior waterproofing membrane while also requiring separate treatment at concrete construction joints.
The objective is not to choose between a sealant and a membrane. It is to establish which component provides primary water protection and how the other components maintain its continuity.
This distinction becomes especially important when comparing repair products. A sealant advertised as waterproof may perform well in its intended joint yet be unsuitable as a replacement for a damaged waterproofing assembly.
How Joint Movement Affects Waterproofing
Movement is one of the most important factors in selecting and detailing a joint sealant.
Building components can move because of temperature changes, concrete shrinkage, structural deflection, settlement, or other loading conditions.
If a joint is expected to move, the waterproofing must accommodate that movement.
Static joints vs. movement joints
A relatively static connection may experience little anticipated change in width.
A movement joint is intentionally designed to accommodate expansion, contraction, or displacement.
An expansion joint is not equivalent to a small crack that can simply be filled.
The required waterproofing must remain functional throughout the expected movement range.
Why joint geometry matters
For a liquid-applied sealant, performance depends on more than the formulation.
The installed bead must have an appropriate width, depth, shape, and bonded surfaces.
Many conventional movement-joint designs use a compressible backer rod or a bond-breaker material.
These components help control the sealant profile and prevent unwanted adhesion to the back of the joint.
This matters because a sealant bonded to three sides may be restrained in a way that increases stress during movement.
The goal is to achieve the joint configuration specified for the selected system.
What do ASTM standards tell you?
ASTM C1193-25, Standard Guide for Use of Joint Sealants, addresses sealant joint design and application considerations, including preparation, backing materials, primers, and installation conditions.
ASTM C920-18(2024) provides a specification for elastomeric joint sealants and includes classifications related to product properties and intended use.
These standards help professionals evaluate products and installations.
However, a sealant meeting ASTM C920 does not automatically satisfy every waterproofing requirement, and a published movement classification does not eliminate the need for appropriate joint design.
How wide or deep should a waterproofing joint be?
There is no single suitable dimension for every joint.
The required geometry depends on expected movement, product capabilities, installation tolerances, and substrate conditions.
ASTM C1472 provides guidance on calculating joint width while accounting for movement and other effects.
For a specific project, use the approved joint design and the manufacturer's installation requirements rather than applying a universal bead dimension.
Waterproofing Concrete Construction Joints
A construction joint is formed where separate placements of concrete meet.
These locations can provide a pathway for water when the structure is exposed to groundwater or other water pressure.
The required treatment depends on whether the joint is expected to remain relatively stable or accommodate significant movement.
Embedded waterstops
An embedded waterstop interrupts the potential water path through a concrete joint.
Waterstop profiles must be located correctly and remain properly positioned during reinforcement placement and concrete pouring.
Connections, changes in direction, and intersections need suitable details.
Damaged or displaced waterstops may be difficult to correct once concealed by concrete.
Hydrophilic waterstops
Hydrophilic materials are designed to swell under specified moisture conditions.
This swelling can help seal a confined construction joint.
However, these products have limitations related to confinement, premature water exposure, substrate conditions, and movement.
They must be installed according to an approved system.
Combining waterstops with exterior membranes
For some below-grade structures, a designer may specify both a waterstop at the joint and a continuous exterior waterproofing membrane.
This provides different protective functions at the same vulnerable location.
IIBEC's technical publication on below-grade waterproofing selection and design identifies joints, penetrations, and terminations as important areas for detailed coordination.
The chosen combination should reflect the structure's groundwater exposure and approved design.
What about expansion joints in concrete?
An expansion joint requires a system capable of accommodating its design movement while resisting the expected water exposure.
Depending on the application, it may use an embedded waterstop, flexible membrane transition, specialized joint assembly, or a combination.
A rigid patch across an active expansion joint can restrict movement and fail.
These joints should be treated as designed building components, not cosmetic gaps.
Waterproofing Around Pipe Penetrations
Pipes and other services create an interruption wherever they pass through a waterproofing layer.
The challenge is to establish a reliable connection between the pipe, the surrounding structure, and the waterproofing system.
Exterior wall penetrations
Above-grade wall assemblies commonly use a drainage plane behind the cladding.
When a pipe or vent passes through this plane, the flashing must direct water downward and outward.
The U.S. Department of Energy's guidance on flashing wall penetrations describes integrating sealants, tapes, and flashing with the wall's continuous water-control layer.
The important principle is that water reaching the detail must still have a safe drainage path.
A bead of caulk around the visible pipe opening is not necessarily enough.
Below-grade pipe penetrations
Foundation wall penetrations can be more demanding because water may reach the opening under pressure.
The correct detail may involve a pipe sleeve, sealing flange, compatible membrane collar, compression seal, waterstop, or another specified assembly.
The penetration design must account for the pipe material, outside diameter, movement, and expected groundwater conditions.
A pipe should not be assumed watertight simply because sealant has been applied where it enters the concrete.
Why movement matters around pipes
Piping and surrounding concrete may respond differently to temperature changes, settlement, or mechanical loads.
The penetration detail must accommodate the movements expected by the designer.
A rigid material packed around a pipe may not be suitable where differential movement is anticipated.
Closely spaced pipe penetrations
Several pipes grouped together can make waterproofing more difficult because there may be insufficient access between them for proper membrane detailing.
The project team should consider spacing and installation access before services are fixed in place.
A tightly packed pipe cluster may need a specially designed penetration assembly.
Detailed methods for selecting and constructing these connections belong in a dedicated guide to waterproofing around pipe penetrations.
Waterproofing Membrane Seams and Laps
Every sheet waterproofing system has a method for joining adjacent membrane sections.
Depending on the system, seams may be heat-welded, bonded with approved adhesive, self-adhered, or completed with a compatible tape or detailing strip.
The correct joining method must follow the manufacturer-approved system.
Why overlap direction matters
On many above-grade drainage-plane and flashing assemblies, materials are installed with shingle-style laps.
This means an upper layer overlaps a lower layer so that water moving downward is directed outward rather than behind the protective surface.
The direction of water flow should determine how those components are connected.
However, not all below-grade or roofing membranes rely on conventional gravity laps.
Fully bonded, welded, pressure-rated, and other specialized assemblies can have different seam requirements.
Follow the tested system rather than applying one overlap rule to every membrane.
Why ordinary tape may fail
A tape can appear securely attached immediately after installation while still being unsuitable for long-term waterproofing.
Relevant factors include:
Surface cleanliness and moisture
Substrate porosity and texture
Installation temperature
UV exposure before covering
Adhesive compatibility
Exposure to water or immersion
Expected movement
Manufacturer-required pressure or rolling
Whether the tape remains exposed or is protected
A tape sold for general construction or temporary weather protection should not automatically be used as a waterproofing membrane seam tape.
Can you combine products from different manufacturers?
Sometimes compatible products can be combined within an approved assembly.
However, using separate brands without documented compatibility can create adhesion and warranty problems.
The manufacturer or responsible designer should confirm the suitability of the proposed combination.
This applies especially to membranes, primers, adhesives, sealants, tapes, and protective coatings.
Roof Decks, Balconies, and Door Thresholds
Horizontal waterproofing assemblies contain several critical transitions.
Common examples include the connection between the deck membrane and an exterior wall, the door threshold, drains, parapets, and railing attachments.
Deck-to-wall transitions
The waterproofing must connect the horizontal deck surface to the adjacent vertical assembly.
A compatible membrane upturn, flashing, and termination detail may be necessary.
The connection must account for water moving across the deck and water draining down the exterior wall.
A surface bead of sealant should not be assumed to replace the full transition detail.
Door thresholds
Door thresholds combine several challenges: low elevation, concentrated rain exposure, changes in material, and possible movement.
The waterproofing, sill pan, drainage, and adjacent wall flashing must function together.
A low or accessible threshold may require a specially coordinated design.
Sealing the visible gap beneath the door does not necessarily correct a defective underlying waterproofing connection.
Drains and scuppers
Where a drain passes through a waterproofed roof or deck, the membrane must terminate into a compatible drain assembly.
The connection may use an approved flange, clamp, welded interface, or other system-specific detail.
The drain should also allow water to reach the outlet without creating an unintended obstruction.
Railing attachments
Railing posts can create penetrations through horizontal waterproofing.
The structural attachment and waterproofing must be designed together.
Where feasible and structurally approved, reducing unnecessary penetrations can simplify water control.
Where penetrations are necessary, use the specified flashing or sealing assembly rather than relying on general-purpose caulk.
How to Check Material Compatibility Before Installation
Compatibility is a separate requirement from whether individual materials are described as waterproof.
A sealant may adhere well to concrete but perform poorly on a particular plastic membrane.
A tape may adhere to metal but fail on a dusty or damp substrate.
A primer may be required for one surface and prohibited for another.
Six compatibility questions
| Question | Why It Matters |
|---|---|
| Is the material approved for this substrate? | Adhesion and chemical interactions vary |
| Is it compatible with the existing membrane? | Unverified combinations can compromise continuity |
| Can it accommodate the expected movement? | Rigid or undersized details may fail |
| Is it rated for the expected water exposure? | Rain exposure is different from sustained hydrostatic pressure |
| Will it remain exposed to sunlight or traffic? | Some products require protection |
| Does the installation sequence meet product requirements? | Application and curing conditions affect performance |
For a high-risk or concealed joint, product compatibility should be established before work begins.
A site adhesion test may be useful when specified by the responsible designer or manufacturer, but a successful adhesion test alone does not prove that the completed detail will remain watertight.
A Practical Workflow for Planning Waterproofing Details
Reliable detailing starts before products are opened or materials are cut.
Step 1: Identify the water-control layer
Determine which layer is intended to resist or drain the relevant water.
It may be an exterior wall water-resistive barrier, a roof membrane, a below-grade waterproofing membrane, or a specified combination of components.
A detail cannot be evaluated without identifying the protective layer it must connect.
Step 2: Identify every interruption
Review construction drawings and actual site conditions for joints, penetrations, corners, drains, terminations, and changes in material.
Pay attention to locations that will become concealed by concrete, cladding, insulation, flooring, or backfill.
Step 3: Establish movement and exposure conditions
Determine whether the joint is relatively static or designed for movement.
Identify whether the detail faces rain, intermittent wetting, ponding, immersion, or hydrostatic pressure.
These conditions determine the required performance.
Step 4: Select compatible components
Choose sealants, tapes, collars, waterstops, and detailing accessories that are approved for the main waterproofing system.
Do not select each product independently based only on general marketing descriptions.
Step 5: Prepare the substrates
Cleaning, repair, drying, priming, and other preparation requirements must follow the specific installation instructions.
A visibly continuous bead or tape does not compensate for inadequate adhesion.
Step 6: Coordinate installation between trades
Pipe locations, drains, structural joints, door thresholds, and railing attachments should be established before waterproofing work reaches those details.
Late modifications can damage completed membranes or make the specified connections impossible.
Step 7: Inspect before concealment
Check the completed details while they are accessible.
Verify that seams, penetrations, corners, and terminations match the approved system.
Complete required testing and correct defects before the assembly is covered.
Common Waterproofing Joint Failures and What They Suggest
Different failure patterns can help narrow an investigation.
| Observed Problem | Possible Explanation | Appropriate Next Check |
|---|---|---|
| Sealant pulls away from one side | Adhesion failure, contamination, incompatible substrate | Joint preparation, primer, product suitability |
| Sealant tears through its body | Excessive movement, joint geometry, or material limitations | Designed movement and installed sealant profile |
| Tape lifts at an edge | Adhesion problem, unsuitable exposure, or application conditions | Substrate, temperature, rolling, compatibility |
| Leakage at membrane seam | Incomplete bond, weld, overlap, or damage | Approved seam method and accessible defect area |
| Water around a pipe | Failed collar, flange, seal, or another concealed pathway | Complete penetration assembly |
| Recurring leakage at concrete joint | Inadequate joint treatment or water pressure | Joint type, waterstop, membrane continuity |
| Leakage beneath a door | Flashing or drainage defect | Threshold, sill pan, membrane-to-wall transition |
| Water near a roof drain | Defective connection, blockage, or nearby membrane problem | Drain assembly and surrounding waterproofing |
These observations do not establish the cause by themselves.
Water can travel through concealed construction layers before becoming visible.
A stain near a pipe does not necessarily prove that the pipe seal is defective. The water may originate higher in the wall or elsewhere in the assembly.
Can You Repair a Waterproofing Joint Without Replacing the Membrane?
Sometimes a localized repair is possible.
An accessible sealant joint with failed adhesion may be suitable for removal and replacement using an appropriately designed joint system.
A localized membrane defect may be repairable using the manufacturer's approved patching or seam-repair procedure.
However, repairs become more complicated when the existing system is concealed, incompatible with available products, or damaged over a large area.
When a simple reseal may be insufficient
Applying new sealant over an old joint may fail when the underlying material is deteriorated or contaminated.
Adding tape over a leaking membrane may also be ineffective if the tape cannot bond adequately or if water can bypass the repair.
A moving joint may require a redesigned assembly rather than another application of the same material.
And a below-grade leak under groundwater pressure may require a specialized repair method rather than ordinary surface caulking.
Should you remove old sealant?
When replacement is appropriate, failed material generally needs to be addressed according to the repair system's instructions.
The new material must bond to an approved, adequately prepared substrate.
The repair method should account for any remaining sealant residue, primers, joint backing, and compatibility requirements.
Do not assume that a new sealant can bond reliably to any old formulation.
What about concealed structural problems?
Cracking, movement, deteriorated concrete, or damaged framing can compromise waterproofing details.
Where structural distress is suspected, have the condition evaluated before treating the resulting opening as a routine sealing problem.
Waterproofing Details That Require Specialist Attention
Not every joint or penetration can be safely or reliably repaired with a general-purpose product.
Professional design or inspection is particularly important for:
Below-grade joints exposed to sustained groundwater pressure
Structural expansion joints
Water-retaining structures
Occupied roof decks and balconies above enclosed spaces
Large or moving pipe penetrations
Waterproofing around complex mechanical equipment
Concealed membrane failures
Repeated leaks after previous repairs
Penetrations through fire-resistance-rated building assemblies also need special consideration.
A waterproofing sealant is not automatically an approved firestop. The assembly may require a tested firestopping system that must be coordinated with the water- and air-control details.
Where a penetration is part of a flood-protection system, additional performance and code requirements may apply.
What to Ask a Waterproofing Contractor
A complete proposal should identify how the joint or penetration will remain protected after the work is finished.
The description should cover the actual connection rather than simply list a product name.
Ask the contractor:
Where is water entering, and what evidence supports that diagnosis?
Which component provides the primary waterproofing?
Is the joint designed to move?
How will the proposed system accommodate that movement?
Are the sealant, tape, primer, and membrane documented as compatible?
How will water drain away from the detail?
What preparation and repairs are required?
How will the detail be inspected before it becomes concealed?
What testing, if any, is specified for this system?
What maintenance and repair access will remain afterward?
A quote for applying sealant to a visible gap is not equivalent to a proposal for restoring a failed below-grade waterproofing joint or complex membrane penetration.
The scope should reflect the actual failure mechanism.
Pre-Installation Waterproofing Detail Checklist
Before joints or penetrations are sealed, verify these items:
| Checkpoint | What Must Be Confirmed |
|---|---|
| Water source | Rainwater, groundwater, condensation, or another cause |
| Primary water-control layer | Clearly identified and continuous |
| Joint type | Static, construction, movement, or structural joint |
| Expected exposure | Rain, ponding, immersion, or hydrostatic pressure |
| Movement | Within the design capability of the selected assembly |
| Substrate | Suitable condition and preparation |
| Material compatibility | Verified for the actual system |
| Geometry | Correct joint opening, backing, and installation profile |
| Transitions | Approved details at corners, walls, floors, and drains |
| Penetrations | Compatible collars, sleeves, gaskets, or flashing |
| Inspection | Accessible before concealment |
| Maintenance | Responsibilities and future access understood |
For high-risk conditions, the installation should follow project-specific documents and the responsible design professional's requirements.
Frequently Asked Questions
What is the best sealant for waterproofing joints?
There is no single best sealant for every joint. Selection depends on the substrate, expected movement, exposure, and the manufacturer's approved use. Silicone, polyurethane, and hybrid polymer sealants can all be appropriate for particular applications.
Is waterproofing tape better than sealant?
They perform different functions. Flashing tape may be appropriate for membrane laps and selected transitions, while sealant may be suitable for a designed joint. Neither is automatically a substitute for a continuous waterproofing membrane.
Can you use silicone on a waterproofing membrane?
Only when the sealant is approved for the specific membrane and application. Some combinations may have adhesion or chemical-compatibility limitations. Confirm the manufacturer's requirements before combining products.
What is a waterstop in concrete waterproofing?
A waterstop is a component installed at a concrete joint to help prevent water from passing through that joint. Depending on the application, it may be an embedded flexible profile or a hydrophilic material designed for confined use.
Do expansion joints need waterproofing?
Where they form part of an assembly that must resist water, expansion joints require waterproofing details capable of accommodating the expected movement. Ordinary rigid patches or unsuitable sealants may fail when the joint moves.
Is a backer rod necessary for waterproofing?
Backer rods are commonly used in many elastomeric sealant joint designs to control sealant geometry and prevent unwanted bonding at the back of the joint. Whether one is required depends on the approved joint configuration.
How do you waterproof around a pipe through concrete?
The correct method depends on the wall, pipe, movement, and water exposure. A suitable system may use a pipe sleeve, compression seal, waterstop, membrane collar, or another approved connection. Surface sealant alone may be insufficient under hydrostatic pressure.
Can flashing tape stop a basement leak?
Ordinary exterior flashing tape is not necessarily rated for below-grade water pressure. A basement leak should be diagnosed before choosing a repair. Specialized membrane repairs or joint treatments may be required.
Why does joint sealant keep cracking?
Possible causes include excessive movement, unsuitable joint dimensions, poor adhesion, aging, or product incompatibility. Reapplying the same material without investigating the cause may lead to repeated failure.
Can you waterproof a joint from the inside?
Some leakage conditions can be treated from the interior with appropriate specialized methods. However, an interior repair may not restore a failed exterior membrane or address the original water source. Its suitability depends on the specific joint and exposure.
How long do waterproofing sealants and tapes last?
Service life varies by product, substrate, exposure, movement, installation quality, and maintenance. There is no reliable universal lifespan for all joint sealants or waterproofing tapes.
Can waterproofing and firestopping use the same product?
Only where a product and the complete assembly are approved for both functions. Ordinary waterproofing sealants should not be assumed to satisfy fire-resistance requirements at rated penetrations.
Final Takeaway
Waterproofing joints and penetrations is about maintaining continuity between building components.
Sealants close suitable joints. Tapes connect compatible surfaces and membrane details. Waterstops protect specified concrete joints. Collars, boots, and gaskets help integrate penetrations with the surrounding waterproofing system.
The success of these materials depends on movement, adhesion, exposure, drainage, and how the components work together.
Identify the joint or penetration, establish the expected water and movement conditions, and use a compatible detail that connects back to the primary waterproofing system.
That approach is more dependable than selecting a product simply because its label says waterproof.